
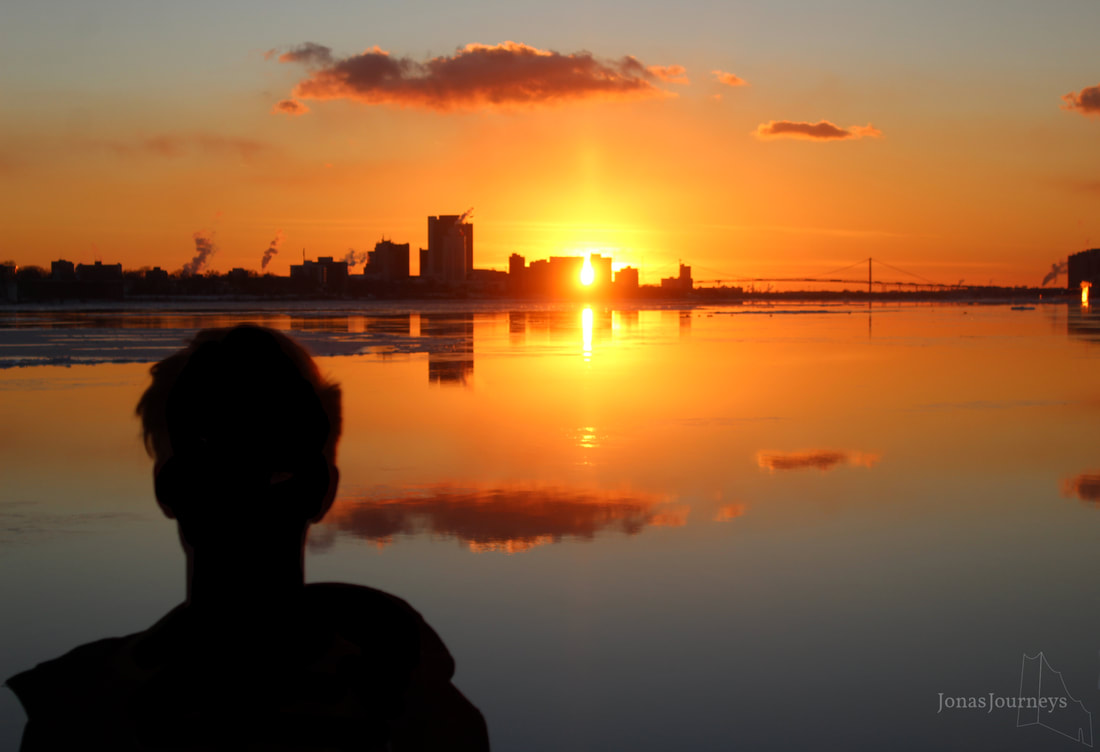
 There it is, the end of this semester. In the following days, my half year long journey in photography will end. The daily lesson not only taught me how to take a good picture, but helped me really getting settled in my new school and home. Being only something I heard of briefly and kinda was doing always, I didn’t imagine photography being that exciting, fascinating and capturing. I started off the semester as a stranger. It is one of the hardest challenges to come into a different environment with different people and culture. By that I didn’t necessarily mean my new home, but also the photography class. My first shots I took for this class were simple and lacked artisticness. In my first major assignment, the Alphabet, I didn’t have a lot to say and the shots only showed the element I wanted to show. Soon after, my focus shifted away from just capturing an object to actually displaying an idea and a story. I learned a lot about compositional techniques and other tricks and created for almost all of them a collection of shots. The first one to come along was “Simplifying”, teaching me to simplify the background and leave space for the main object to attract the viewers attention even more. Therefore I captured an everyday situation and just changed the angle to get stuff out of the way. From this rather easy improvement I moved to even more specific adjustments I could make to clarify the message of a picture and make it interesting. I moved on to implementing leading lines and framing to my pictures, I specifically started to fill the frame of the picture as a whole, I started getting better at Photoshop allowing me to modify my pictures and improve them even more. With my actual photography skills improving, it was time to get the camera itself to the next level, too. I started dealing with an actual camera, instead of my phone and learned to adjust it according to the setting. After years of taking pictures with a phone, it was quite a little challenge, to adjust to my new way of taking pictures. Looking back I would even say, it was one of the biggest challenges in the whole semester. Even though, with my two latest articles being about Aperture and how it’s changing the depth of field and Shutterspeed, I just touched the surface of a big camera setting universe, I’m satisfied with my progress so far. I start to understand the details and hidden tricks about the secret of taking good pictures. With this attitude I went into my last shooting. My final shot shows Jonas from Germany looking into the sunset at Belle Island, Detroit. Jonas is metaphorically seeing the sun of my first semester setting as it is about to end. Further the bridge connecting the US and Canada, I wanted to display the connection of two different countries with their cultures. Jonas ist standing right in between. Since the semester being almost over now, I’m either sad that it’s over, but also thankful for the things I experienced and learned. I learned to appreciate the greatness of a good picture and what it can do. I believe, that photography by time will just evolve into an even stronger tool to express a thought and wake interest in people that look at a picture.
0 Comments
On my journey of refining photographing skills, it was clear I would have to deal with shutter speed sooner or later. The shutter speed is best defined by the time, the camera takes create an image. The longer the lens is open and light can enter it, the more light can get into it. Therefore it is important to use a tripod if you want to take a picture with a long shutter speed. The beauty of that is, that a long shutter speed can show movement in the final result. As long as the subject, you want in focus is not moving, a moving part of the picture will blur out. With a high shutter speed, the time for the camera to capture light, is lower. Therefore the moving action is frozen. Considered the amount of time I had for this assignment, I am very satisfied with how it worked out.
It challenged me quite a bit to come up with a good idea for how to freeze an action. Except for that, it also took me quite a while to adjust the camera settings. Thanks to Meeghin for modeling and Nik for throwing a bunch of leaves. That must have looked really awkward... Aperture is a word out of the camera vocabulary, I never really understood. However, in my photography class I just learned about it and got used to the term. The Aperture is the opening of the camera. The bigger it is, the more light can pass through to the sensor. To describe how big the aperture is, we use f/stop numbers. Confusingly, the bigger the number, the smaller is the actual aperture. f/32 is a really small aperture while f/4 is a really small one. The aperture effects the size of the area in focus. For my first picture I wanted everything to be in focus, so I chose a small aperture: f/25. 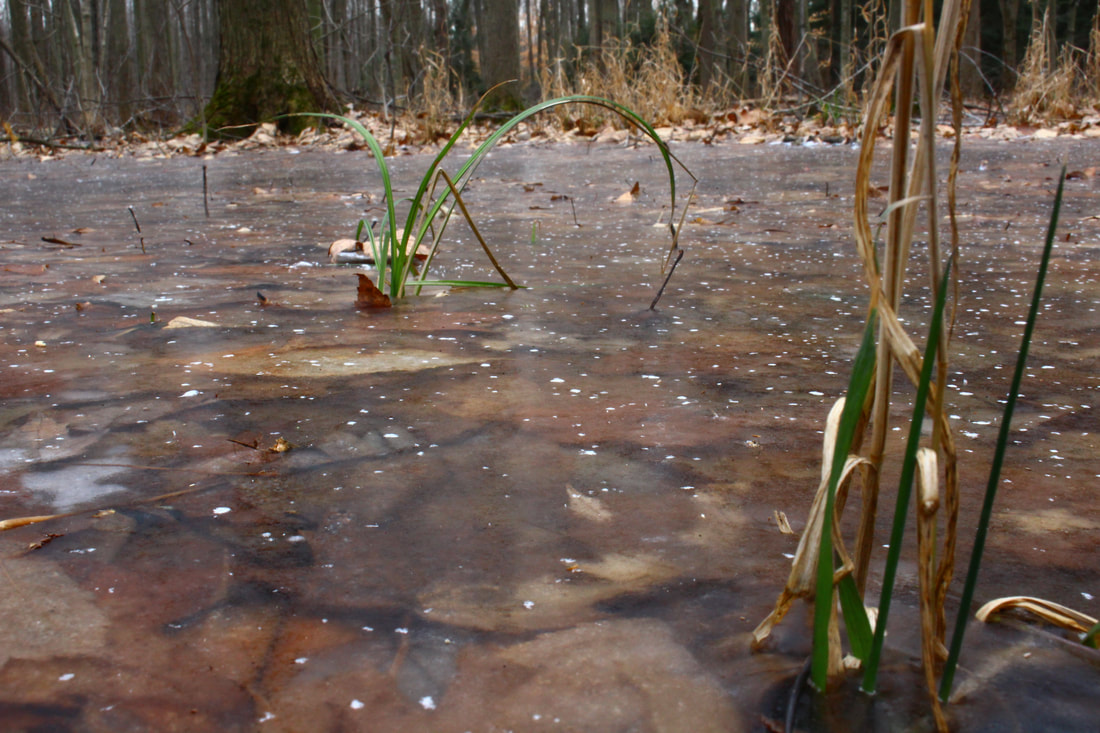 For the next two I wanted first the grass in the foreground, then the one in the background in focus. Therefore I chose the aperture to be large to create a deep depth of field. For these two I picked f/4. 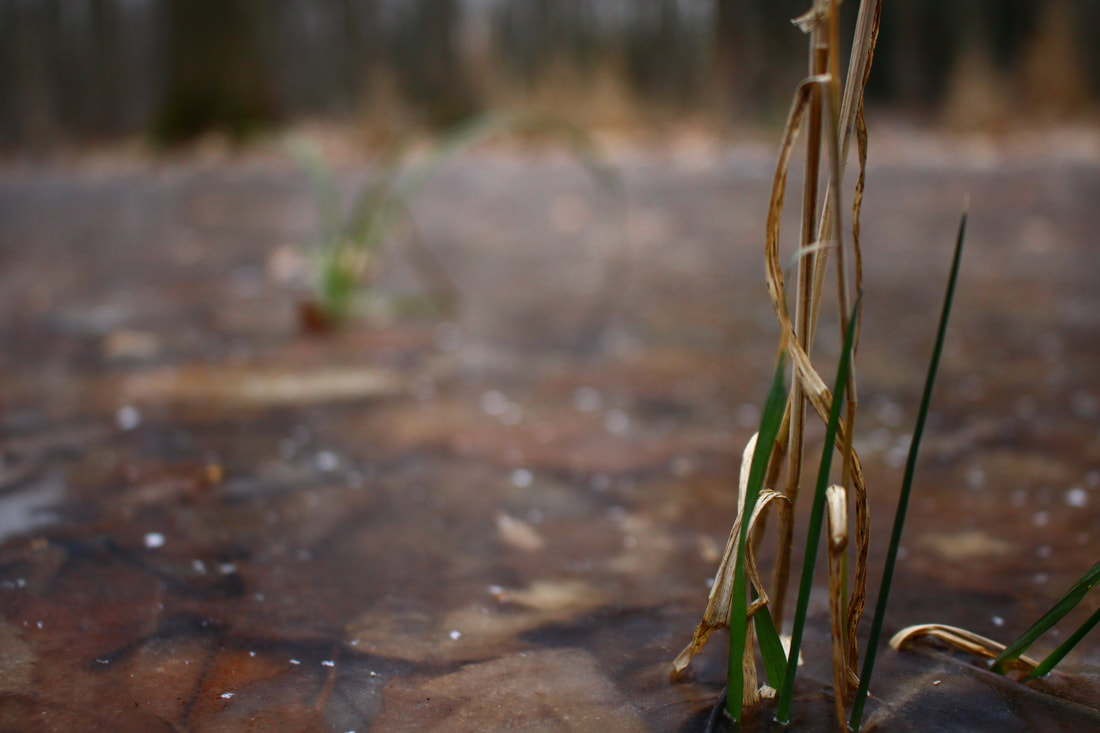 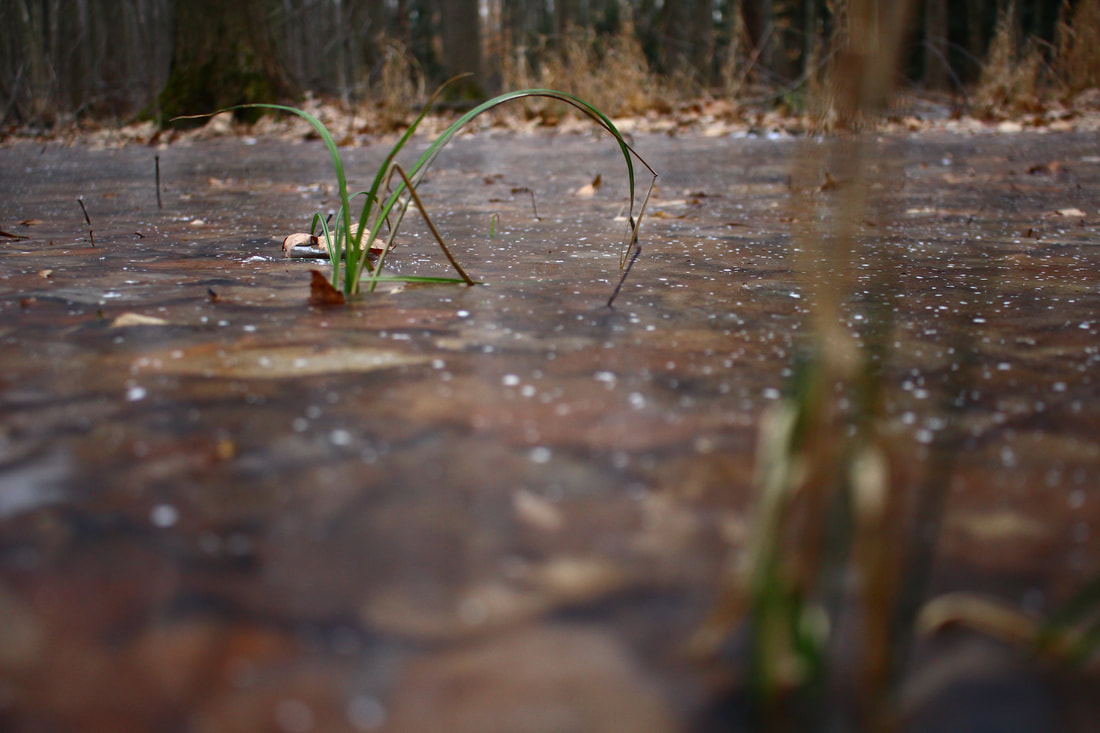 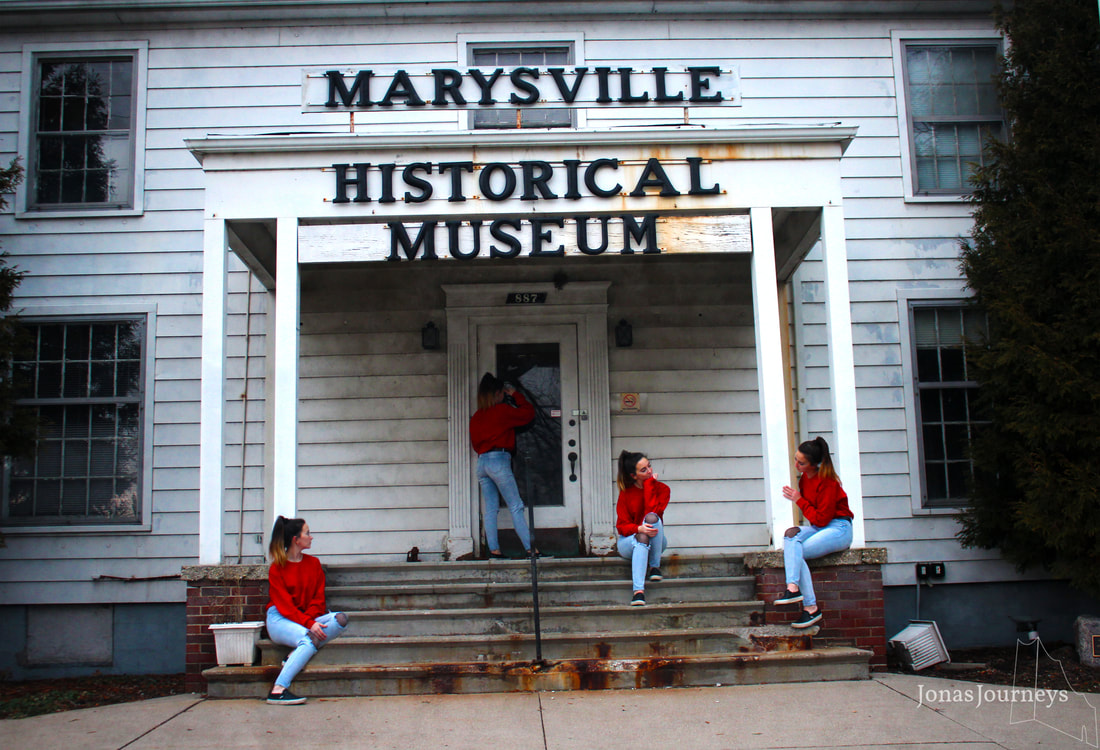 For this assignment I had to consider a lot of things. As things get more advanced, I got used to really plan a shot out in my head before I go out and shoot it.
For this one I went to the former Marysville Historical Museum. I love the atmosphere of the old buildings entrance. To get a nice contrast to the dusty white building I had Meeghin wearing a red hoodie. Thanks again for Modeling Meeghin! The final goal was to have an image with three or more of the same persons on one location. Therefore I had to use a tripod in order to not move the camera at all between the shots. It was kinda difficult to not move the camera when I pressed the button to take a picture. In Photoshop I used layer masking to put the different Meeghins on one picture. In this assignment I dealt with a new composition technique to further improve my photographs: Fill the Frame. Surprisingly, it deals with filling the frame, the photo, with as much as possible. A good photograph shouldn't have too much blank space, which is unnecessary for the photographs object, atmosphere or message. For some pictures, it can even get so far, that parts of the main object are cropped out. But sometimes the pictures story is defined by details, so it's important to make sure the right amount of details or background is not lost by the cropping. Here are a couple of shots, in which I especially paid attention to that aspects. Thanks Meeghin for modeling! Furthermore, I decided to edit the pictures on a bit more intense level. Therefore I used three new techniques in Photoshop which I want to display here too. In the first one, I used a texture by Nathan Anderson to give the photo a different look than before. The very detailed texture gives the beautiful shot showing Meeghin with a beautiful sunset in the background a more chiseled and crispy appearance. It almost looks like it was captured by an older camera. 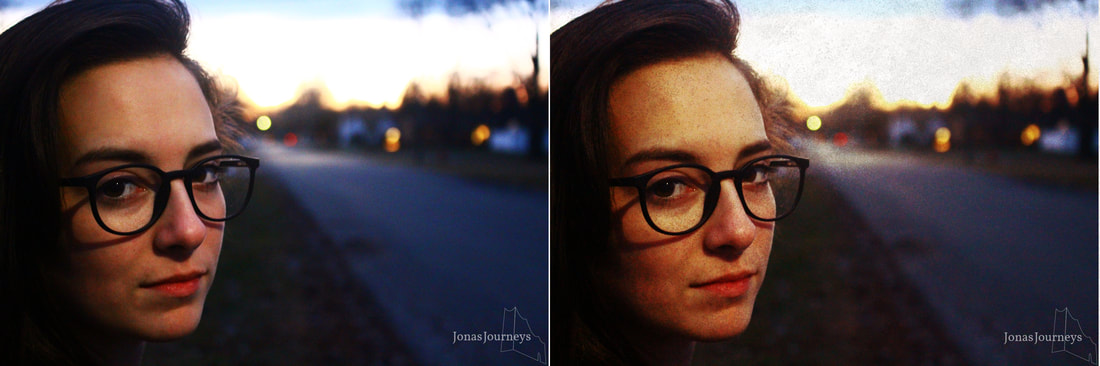 The second new technique is my personal favorite. With Photoshop it's possible to blend a color to a picture. That can not also improve lighting and color at certain spots, but it can create a certain mood in the picture. In that particular example, I added a blue overlay and blended it with the Soft Light mode. By turning the opacity down, the transition between the two pictures went very smooth which I'm very satisfied with.  The third and last new photoshop technique deals with Smart Filters. A filter modifies the pictures structure by making it look like it was painted for example. A filter can also add noise or smoothen certain spots in a picture. To the picture below, a shot showing Meeghin with the sun and a street light in the background (which makes it look like there were two suns a bit), I used the Smart Filter "Fresco" by converting a layer into a smart object and then adding the filter. Even though I admittedly don't use filters a lot, I'm kinda satisfied with this result. 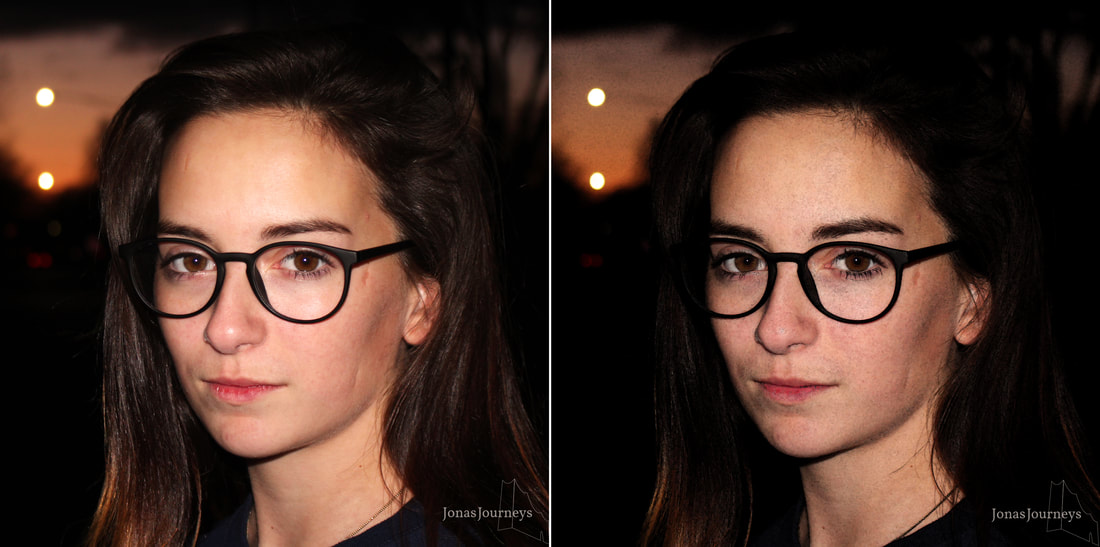 By creating these shots, I learned a lot of new stuff dealing with the making of a picture and the editing in Photoshop. I really enjoyed this little task.
My favorite shot of all these ones probably is the one with Meeghin in the slideshow. I love the way the shadows and the sunset in the background leave space for interpretation and the moody atmosphere thats created by the overall color. Framing is a technique in photography in which (surprise) the object or person in the picture is framed by its surrounding or another object or person. In the slideshow above I displayed some of my favorite shots using framing. My favorite one probably is the one with Patty. She is framed by the street behind her.
The hardest part of this little challenge was to find objects that create a frame in a way that fits to the context to the rest of the picture. I had to come up with some unique solutions, but see for yourself. Thanks also for modeling Meeghin and Nik! In this photographs I explore how leading lines can guide the viewers eye through the picture. 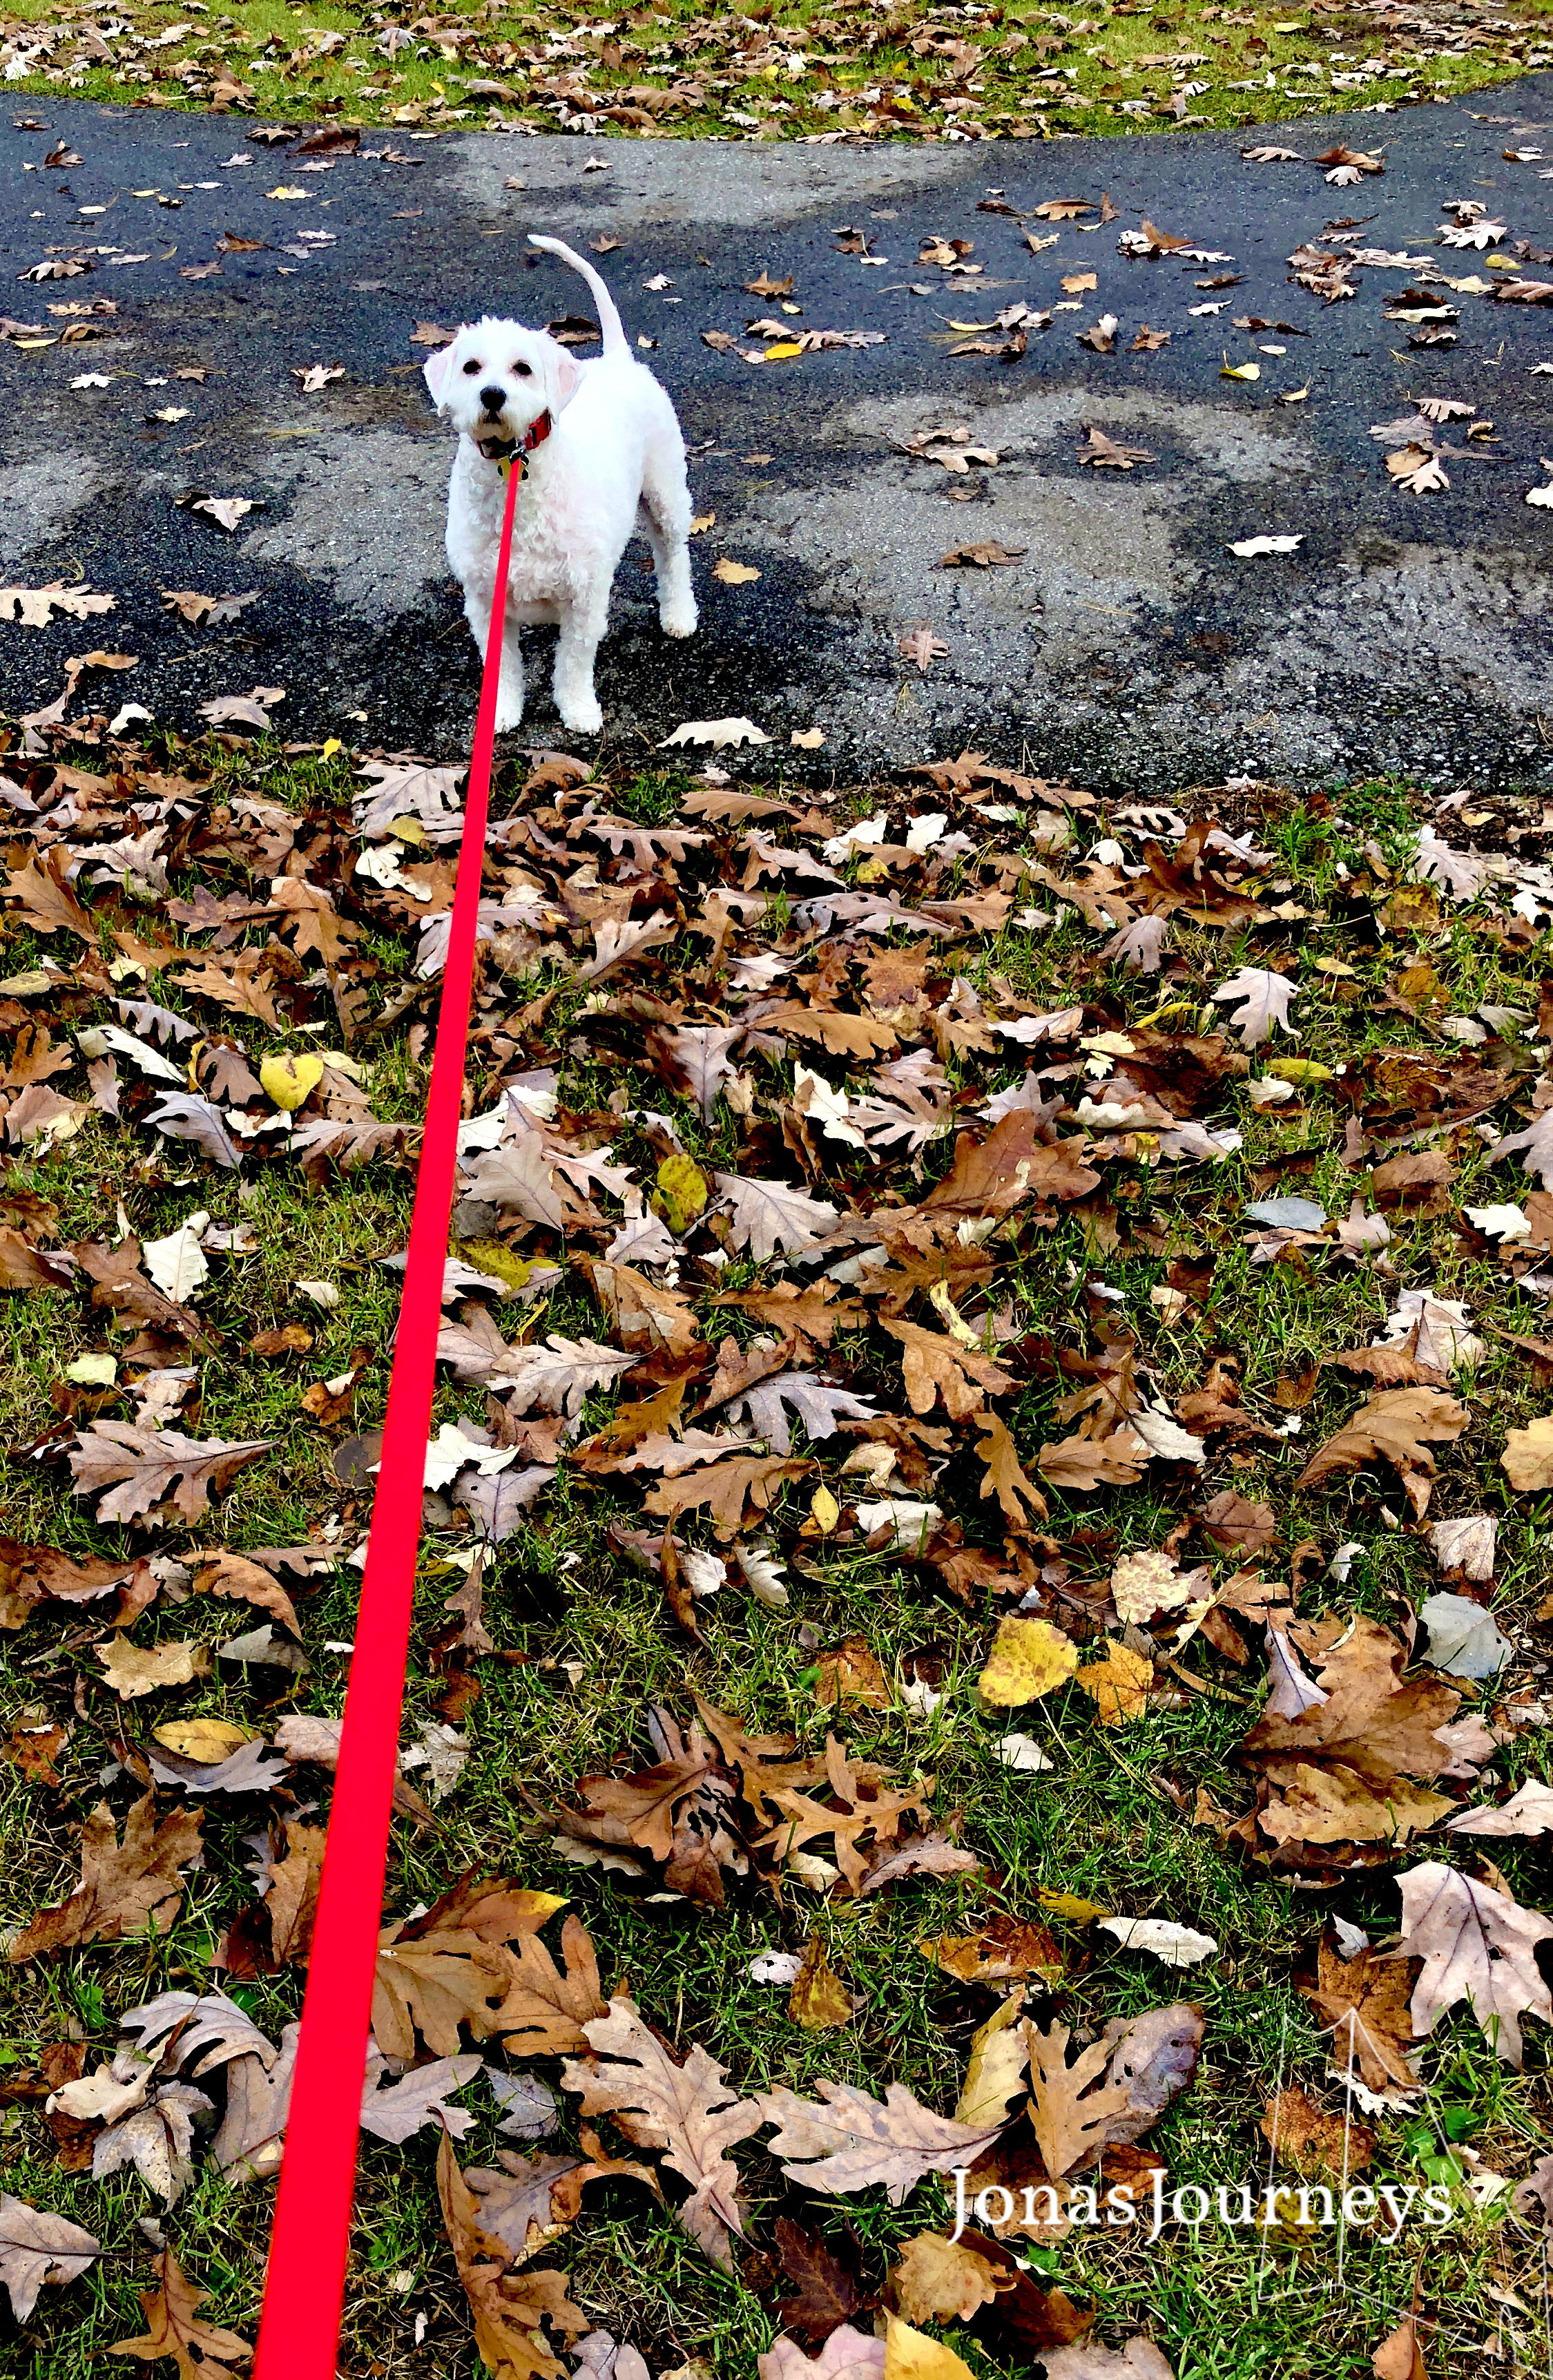  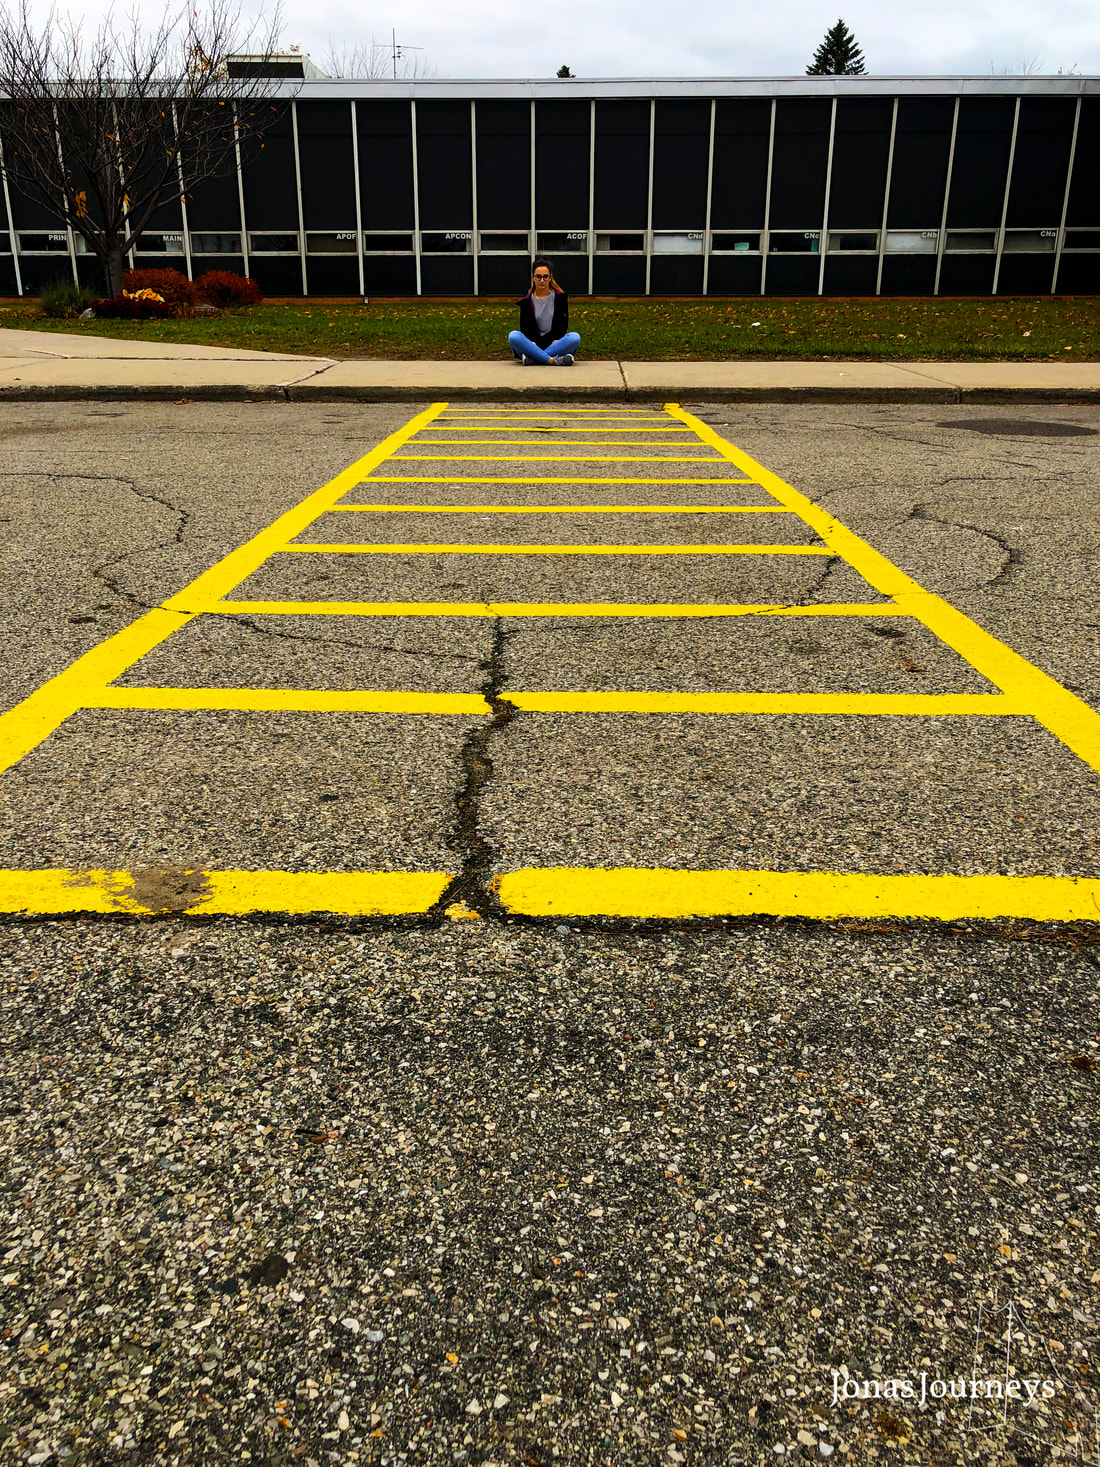 This is my second assignment. In contrast to the first one, which had only one purpose, sharpening the artistic eye to spot objects that have a special shape, this one was about many things, which you can consider basic photography skills. 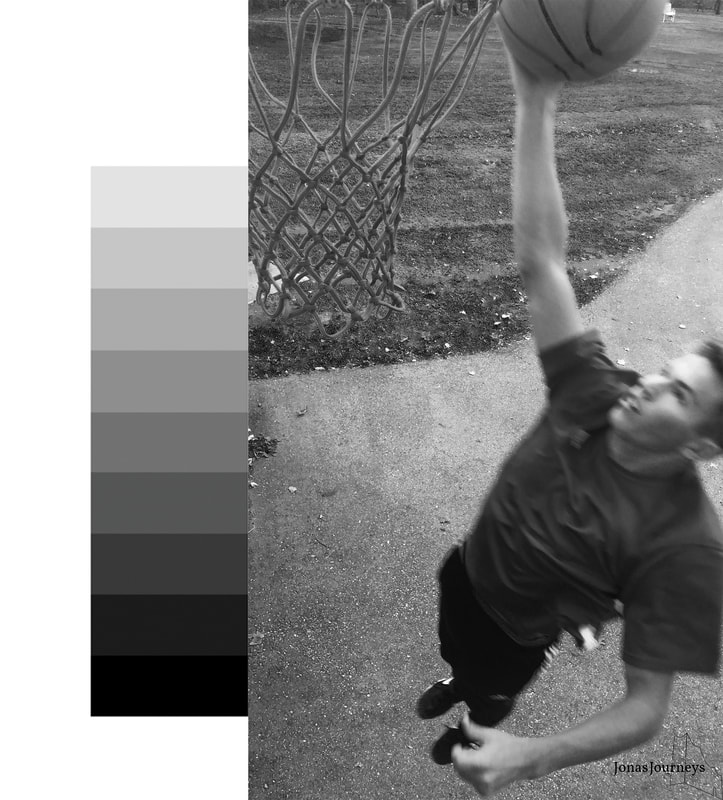 First and foremost, I picked different settings to shoot the photo. I started with places and objects, then I turned to persons. In order to make my final picture of a person a bit more interesting I decided on taking the photo in action. Thanks Christian for making a couple of dunks. Go to Christian here! One of the criteria was the viewpoint. This picture of him dunking the basketball is taken from the "birds-eye perspective". This next picture below was taken from the worms eye perspective. What I like in this picture is the big variety of "color". When you compare the scale with the different grey shades, you will notice that from the really pure white spots, like on the pants, to the really black ones, like at the tree, everything is there. I first learned to use several tools in Photoshop to adjust the variety of shades and maximize contrast and thereby sharpen the image on this photo. I really appreciate that since it makes my pictures so much better. 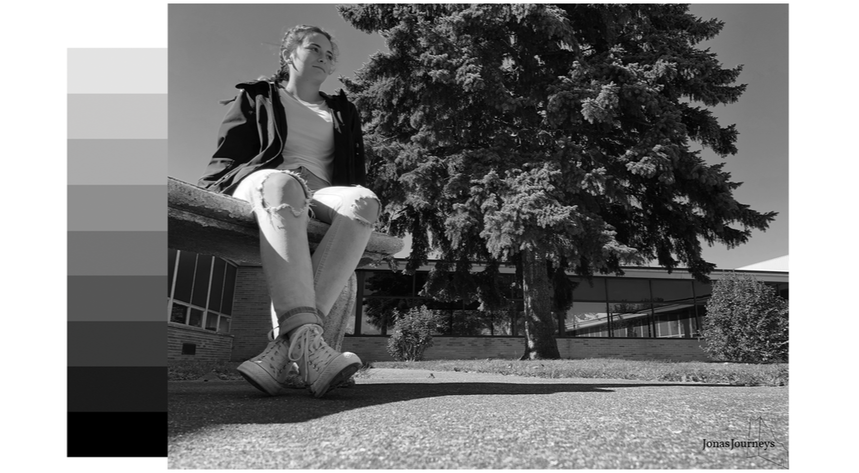 The picture was taken in a spontaneous mood and scene. Even though the scene with my just a girl, the tree, and the building is kinda simple, in my opinion you can still make a pretty strong interpretation from this picture. Thanks to Meeghin for modeling! I feel sorry for letting you sit in the cold for so long. Check out her photography site here! This last picture is good for pointing out the last rule I had to think of before taking photos: The Rule of Thirds. The Rule of Thirds is about not placing objects right in the center of the image, but alining them along nine equal rectangles in the pictures. For example, the basketball player in this picture is not right at the center, but jumps into the picture from the right. He thereby leads not only the viewers eye to the net that's hanging from the top, but also gives space for some background in order to create a story.  A point why I also like this picture is the light. When I took the photograph, the setting sun was right behind me not only lightening up the treetop in the background, but also throwing a shadow on the player. In the post editing it was challenging to find a compromise between accentuate the players strong outline and lighten up his facial expression to not make it one dimensional but give the picture more details.
What this assignment changed a lot is how I think first before I take a picture. I now start to create the picture in my head already before even taking out the camera. In the post editing I gained a lot of skills in Photoshop, how I sharpen the message, support bad spots and make good one even more outstanding. Here it is, my first assignment. Everything starts simple I guess... 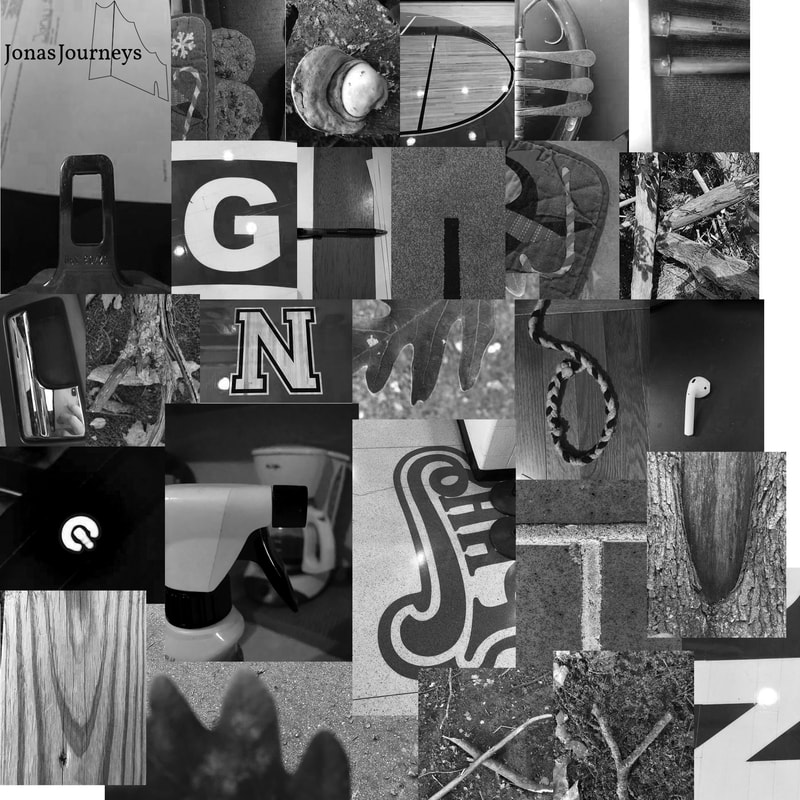 In this project I tried to find letters in my closer surrounding. Its aim was to try to focus on certain objects more closely and sharpen the artistic eye. I walk past objects every day, which on a closer look offer shapes I wouldn't have noticed. While some letters like the T or I were easy to find, some letters required a bit more creativity. Looking back, I am especially pleased with those more hard letters like the R or W. I definitely learned through this project. Looking at things twice and trying to capture an object or scene as best as I can is a thing I should keep in mind. Another assignment, which was more less connected with my first one, was to form a word of the letters I collected. Can you read it? 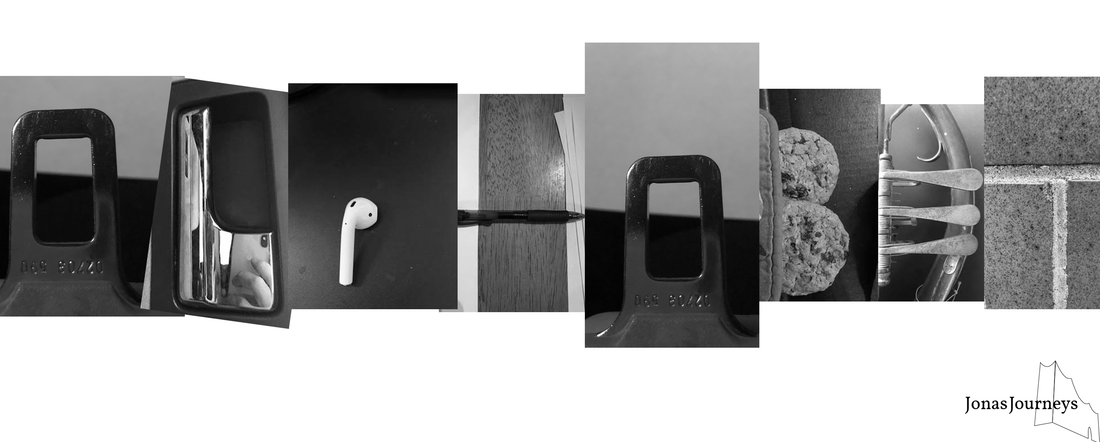 An everyday situation, just shot from another viewpoint in order to simplify the background. Thank you Meeghin! 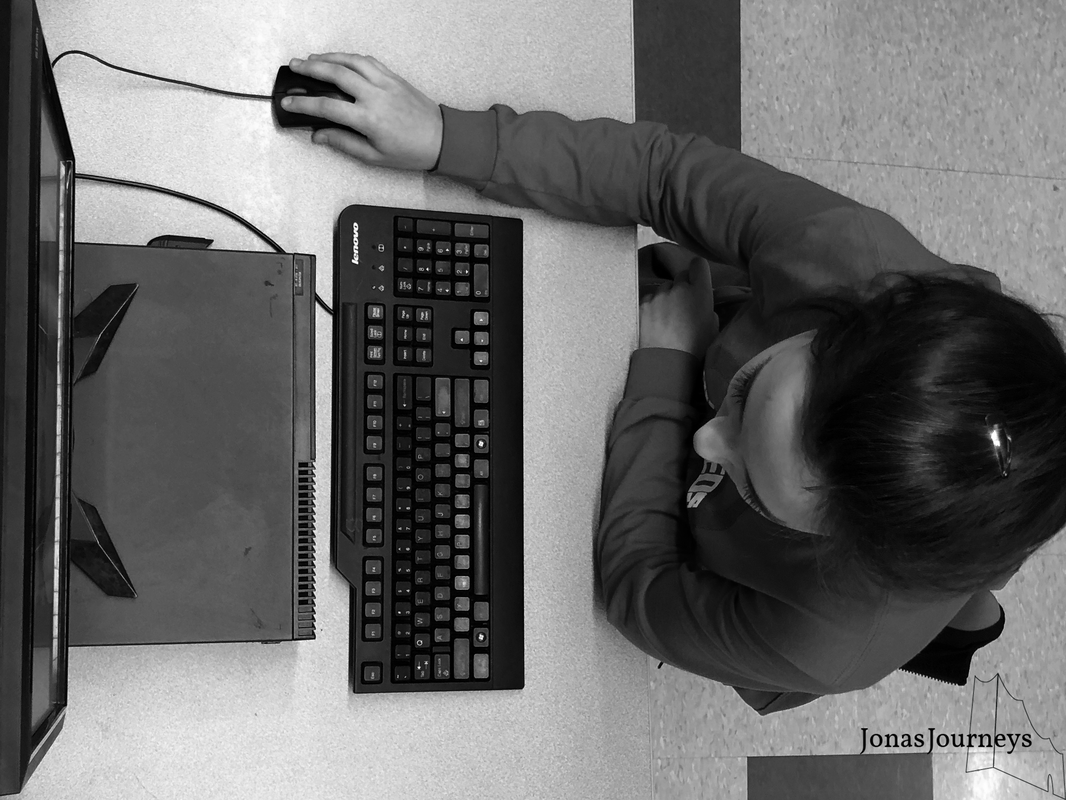 |
